I’ve recently been on a bit of a repair kick and wanted to tell another fun repair story. I promise my blog isn’t becoming dedicated just to fixing electronics. This was an interesting story as far as parts sourcing goes though, so I thought it would be a cool one to share. Plus, you’ll get to learn how focus control works on webcams with autofocus.
I found a really good deal on eBay for two “for parts or not working” Razer Kiyo Pro webcams. These are pretty decent 1080p60 cameras with autofocus and nice image quality. Here’s the item description:
Web cam has been tested and does not power on
It looked like they were both returns to Amazon or a similar retailer, and surprise surprise, the description was completely wrong. They both powered on just fine.
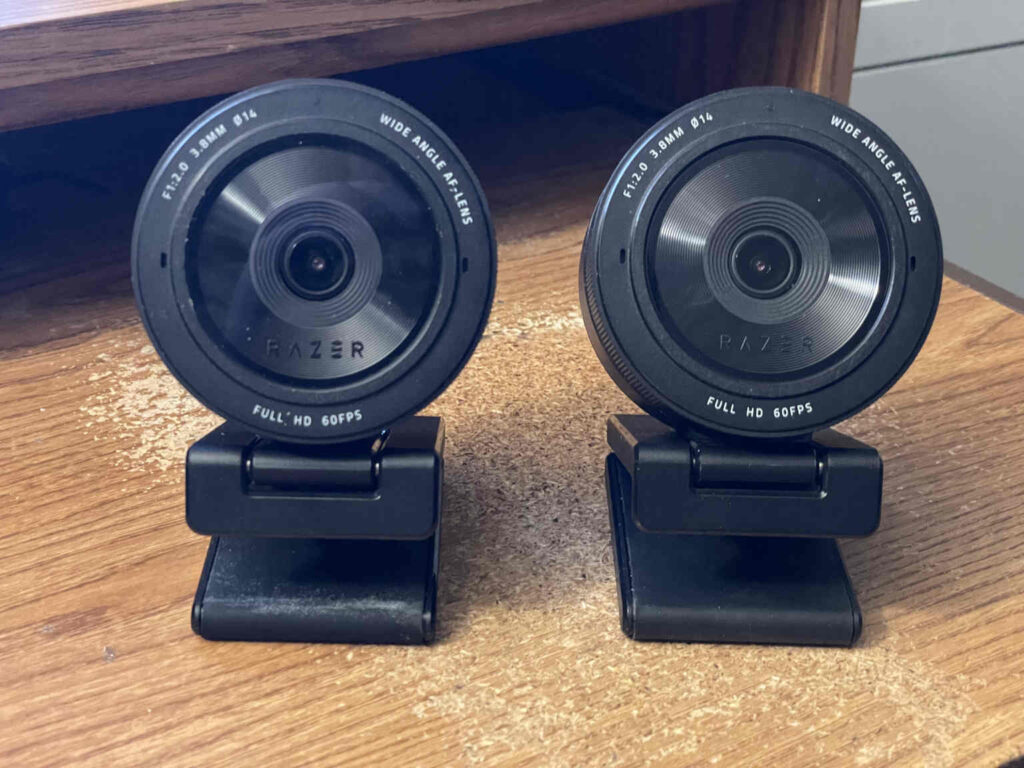
One of them seemed to work great, and the other one was way out of focus and didn’t respond to any focus control commands at all. These cameras support manual and automatic focus control through software, but I just couldn’t get it to work at all on the faulty one.
Luckily, EEVblog did a teardown of one of these so it was super easy to figure out how to disassemble it. There are four screws hidden under the sticker on the back. Removing the back panel revealed the main PCB with a heatsink. You could also see a flat flex cable coming up from underneath, presumably going down to the actual camera module.
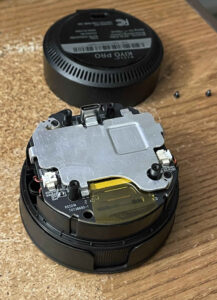
After removing the heatsink, I could see that the main processor is a Sigmastar SAV630D. I didn’t spend a lot of time researching it, but it appears to be an ARM Cortex-A53 vision processor. The firmware is likely stored in the Winbond W25N01GVZEIG SPI flash chip mounted nearby. Much like the Elgato HD60 S from my previous repair, it also uses a Diodes Incorporated mux for handling the USB-C port in both orientations, although it’s a different model.
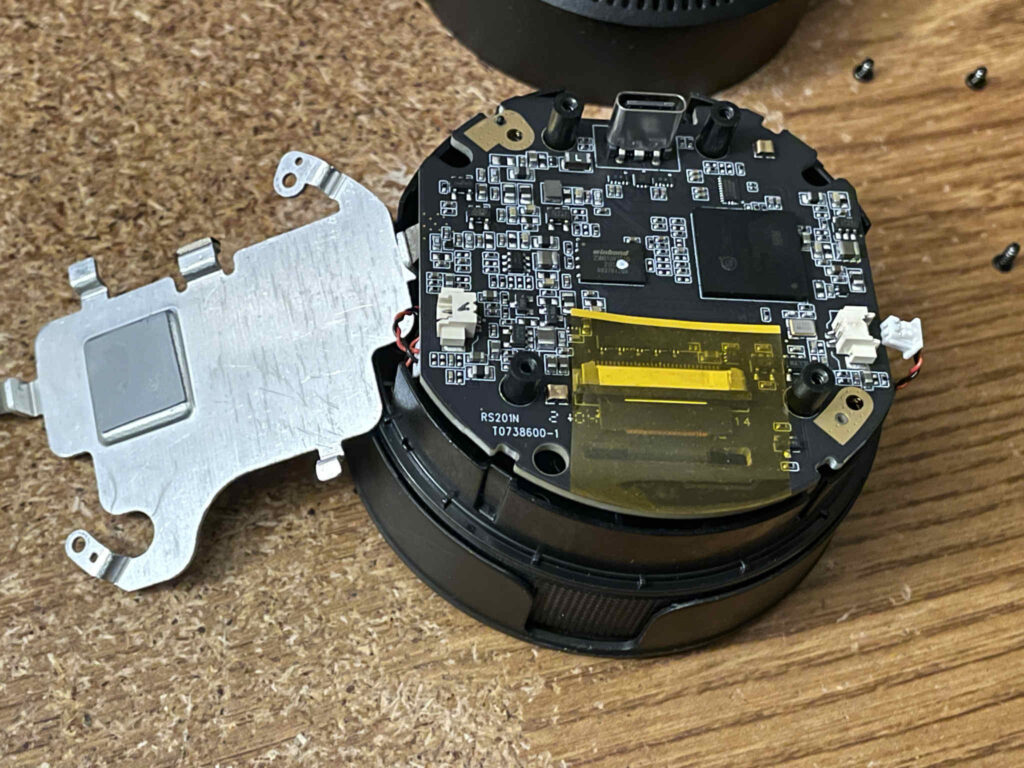
As a quick diagnostic, I swapped the main PCB between the two cameras. I can’t stress enough how much easier it is to diagnose problems when you have a working example of a device! After swapping the circuit boards, the behavior did not change. In other words, the problem followed the camera, not the circuit board. This showed that the problem was likely in the camera module underneath. As far as I could tell, the other two white 2-pin connectors were for microphones.
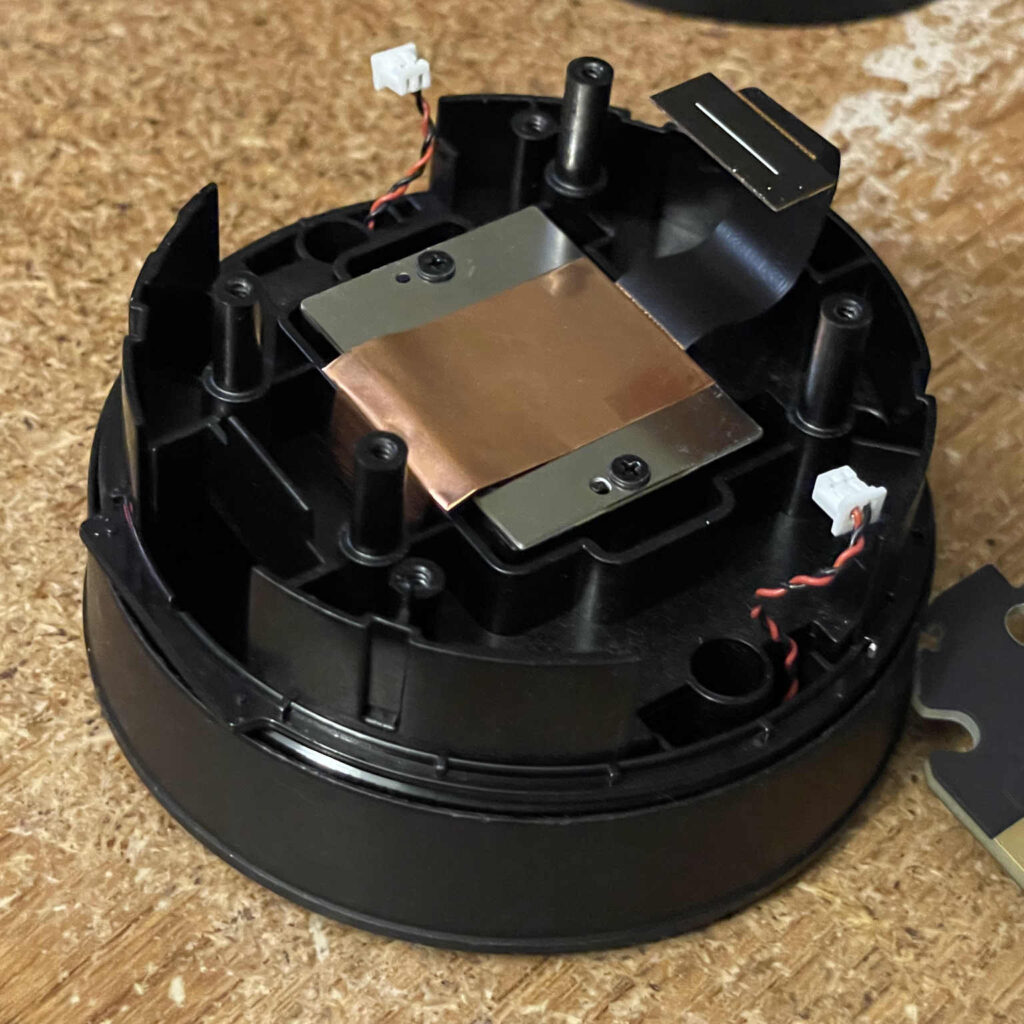
I decided to investigate the camera module further. It was held in with two more screws, and there was a also a piece of copper tape that was holding it in place. I peeled back the tape, removed the screws, and pulled it out.
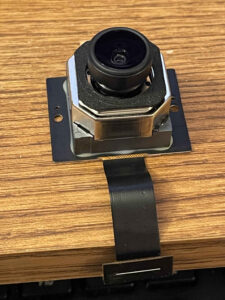
This had to be the problem component. I plugged it back into the main circuit board and played around with it. If I lifted the lens up by hand, the focus would change — but as soon as I let go of it, it would immediately fall back down, way out of focus.
Unfortunately, this camera module didn’t have much identification information. I searched all the usual places like AliExpress to try to find a replacement camera module for a Razer Kiyo Pro, but there was nothing. All I could find was a QR code on the side, and a Data Matrix 2D barcode on the bottom.
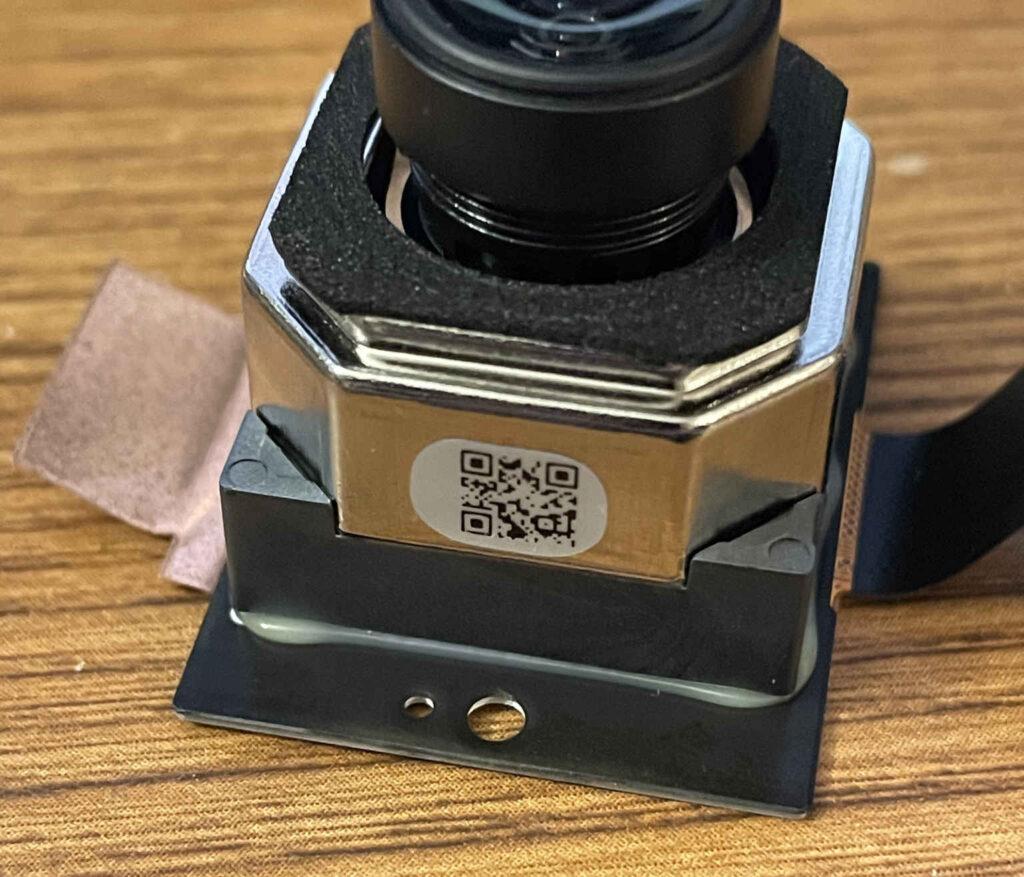
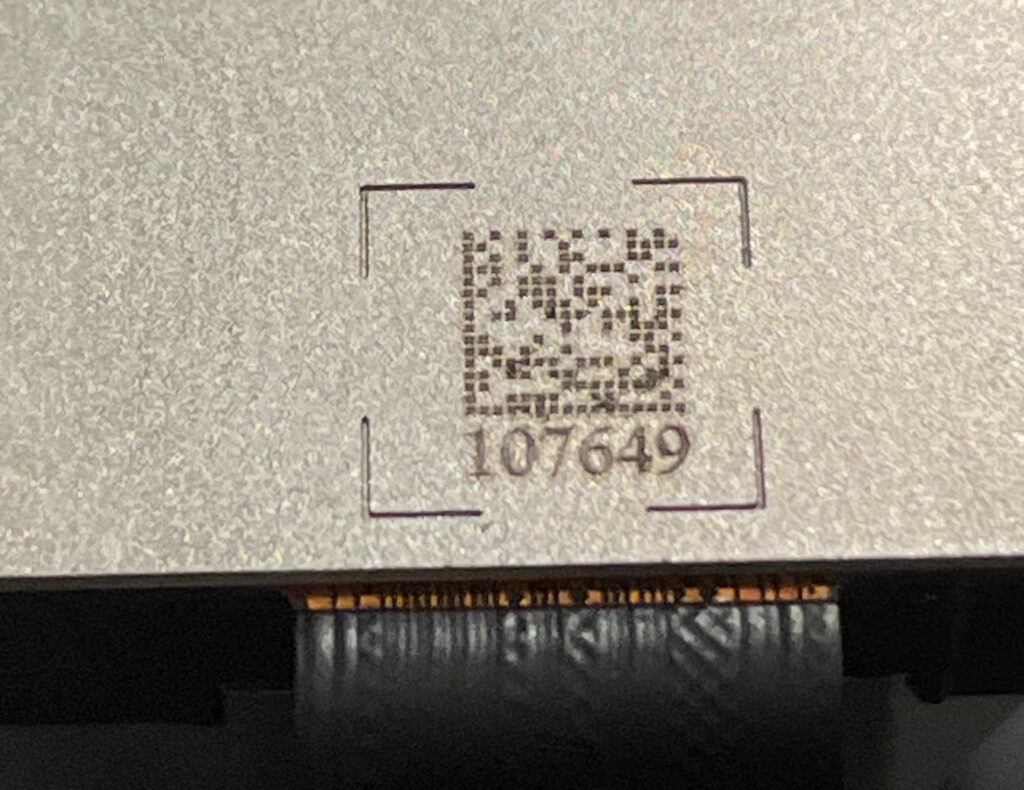
Feel free to double-check my work if you want, but what I found was the QR code contained the following text: XLTVB12003C 20210314. The Data Matrix barcode contained: R201R2108107649. Searching Google for these strings gave me nothing at the time.
I was totally on my own to figure out how to replace this part. I guess I could have just waited until another broken Razer Kiyo Pro popped up on eBay with a fault other than being unable to focus, but I really wanted to figure out what the heck this part was. The only real clue I had was that various sources online claimed that this webcam used a Sony IMX327 image sensor. But even with that knowledge, searching for IMX327 camera modules found nothing close to this.
I saw that the top part with the camera lens seemed to be glued down to the PCB, so I decided to try to break it loose. Maybe there would be more identification info on the bottom of the plastic gray part. This was really difficult and I definitely scratched up the PCB, but I was eventually able to separate the pieces. What I found underneath was the IMX327 sensor, a bunch of capacitors, and two small chips.
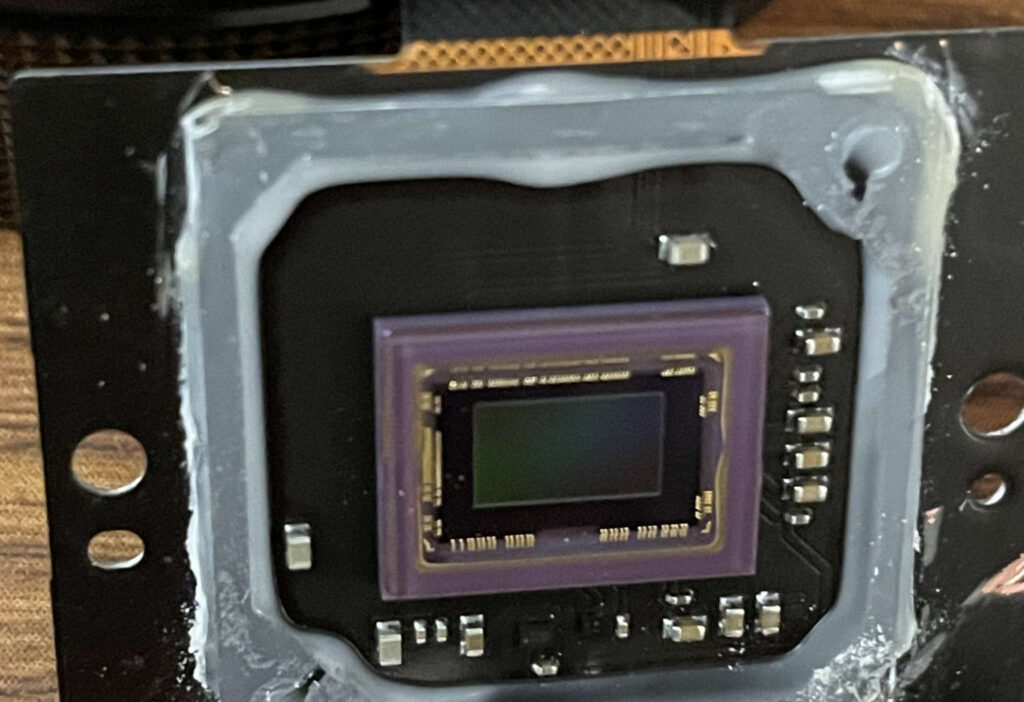
As for the rest of the camera module: well, it was a plastic base, a camera lens with a coil of very thin wire wrapped tightly around it a zillion times, and a magnetic metal top (the part with the QR code sticker on it).
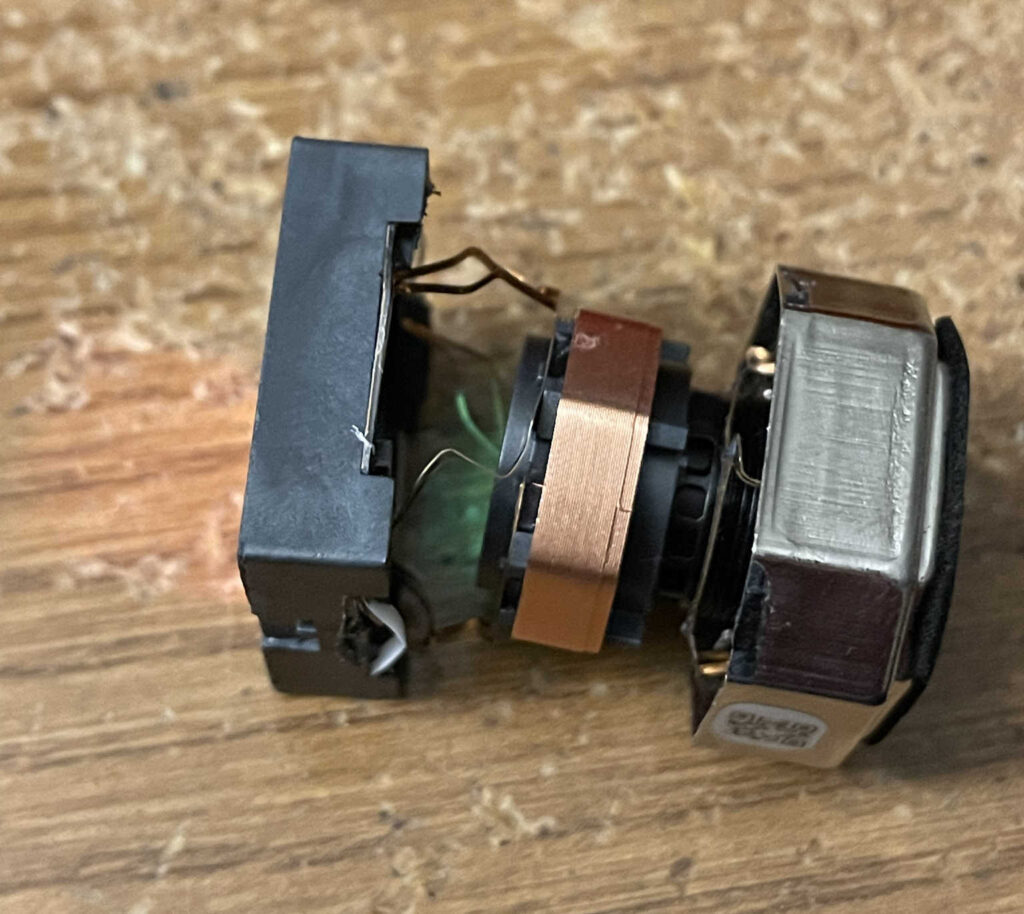
I eventually determined that the lens was a separate assembly that had been screwed into the plastic piece with the coiled wire, but it was also glued to hold it in place. I broke it free of the glue using my Vise-Grip pliers and some brute force.
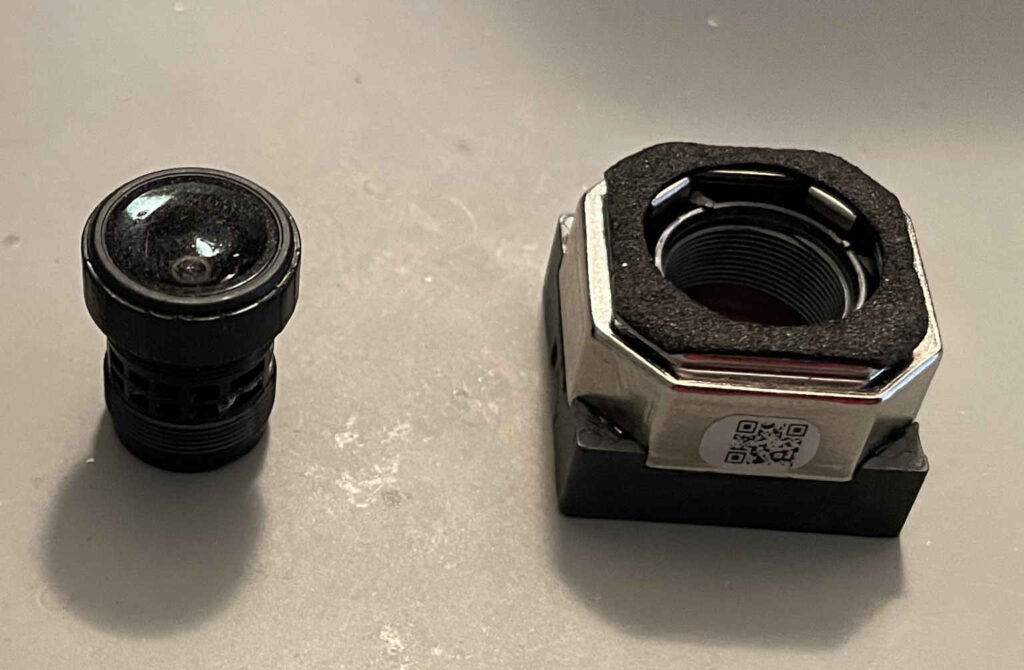
I really had no idea what I was looking at, but I noticed that there were two wires going from the PCB up to this module. It appeared that these wires were supposed to be connected to the two ends of the coil. Here’s a picture I took before I started tearing it all apart.
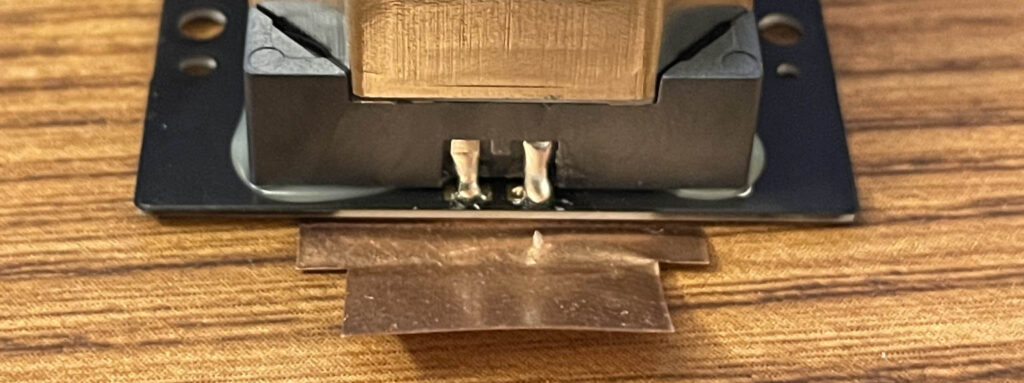
Also, looking at the camera PCB, I noticed there were two small chips nearby. Side note: the close-up view of the image sensor bond wires is kind of cool!
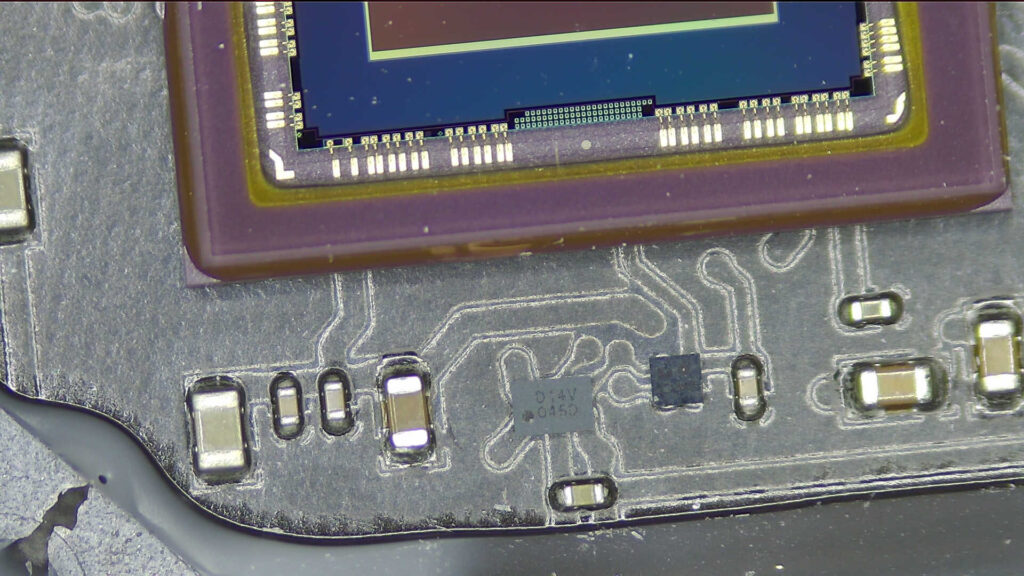
The marking on the bigger of the two chips is D14V. Long story short, with enough digging around, I was able to identify it as the Dongwoon DW9714V.

What exactly is the DW9714V? It’s a voice coil motor driver. Basically it outputs a configurable current from 0 to 120 mA. You use I2C to tell it exactly how many milliamps you want it to be outputting. There’s even code for controlling it from Linux in the mainline kernel. Writing this several months in the future, I don’t remember exactly how I identified this part. I don’t think it showed up in any SMD marking code search engines. I think I guessed what this chip was doing and found a bunch of relevant part numbers, and somehow stumbled upon this datasheet. It was a bit of a miracle.
Anyway, this whole focus control design was starting to make sense. There’s a spring that pulls the lens toward the sensor. To change the focus, you drive a small current into the coil. This causes it to interact with the magnet. As you increase the current through the coil, it’s going to try harder and harder to counteract that spring and move further away from the sensor, which adjusts the focus. As soon as you stop driving current, the spring yanks the lens back home.
So yes, that’s how webcams with focus control work. They use a voice coil motor (VCM) to convert electrical current into linear motion. You precisely control the current, and the VCM will move where you want it to go.
With all that new information, I was now ready to try to answer my real question: why was this one broken?
I used my multimeter to figure out what was screwed up. There wasn’t much that could be wrong. Either the DW9714V chip wasn’t working, or there was something wrong with the coil.
First I tried to measure the resistance across the entire coil, from the two copper contacts that were soldered to the camera PCB. This came back as an open circuit. That wasn’t right — it should have been a small resistance in the tens of ohms. That pretty much told me that the problem was with the coil, but I tried another test. I plugged the camera module back into the main board and wired up my multimeter to the two pads on the camera PCB that were supposed to be soldered to the coil. I set up the multimeter for current measurement mode. Then I plugged in the camera board into my computer, opened up the Razer software, and manually adjusted the focus.
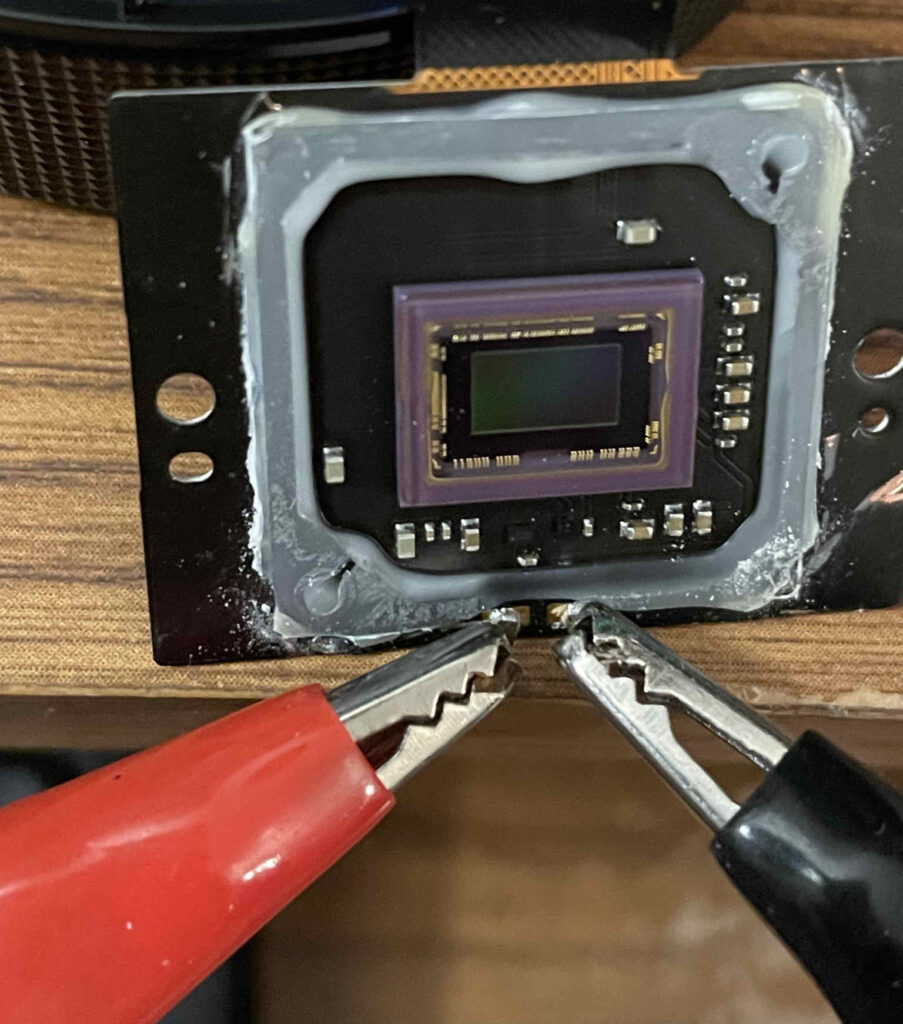
The picture looked terrible — it was just a pink screen. That’s because I didn’t have the lens over the sensor. As I dragged the manual focus slider, the current measured by the multimeter changed. It went from 10 mA at the low end to 80 mA on the high end. This was great news — the DW9714V was working correctly and trying to adjust the focus. The coil was definitely the problem.
Looking deeper inside the module, I couldn’t see an obvious problem with my naked eyes. I ended up tearing the whole thing apart, and found that the entire coil was fine (it measured about 34 ohms), so there was a problem with a connection somewhere between the coil wire and the copper that went to the two pins accessible from the outside.
It was too late because I had permanently damaged the whole coil assembly, but there was no way I could have fixed this on my own. There’s not enough room to get a soldering iron in there to try to fix a connection. By opening it up wide enough to solder anything, you’re already damaging the spring that pulls the lens downward.
My only hope was to find a new module. I was unable to find any more identification info after tearing everything apart, but at least I had a new search term to use on AliExpress: voice coil motor or VCM. I also figured out that it would need to be threaded to accept an M12 lens. It was a lot of terminology I wasn’t familiar with, so I tried to fake my way through it. I struggled to find a perfect match. I decided I could try to jerry-rig something, and bought a VCM that definitely wasn’t the right one but I thought I might be able to make work.
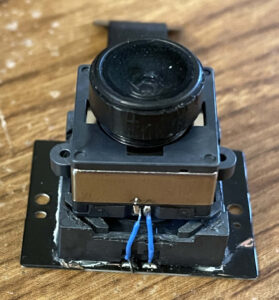
What the heck? I figured if I could get something that worked, no matter how ugly, I could just glue it together and be done.
This actually did work, and proved the concept that this webcam was repairable. Unfortunately, this monstrosity just wasn’t good enough. This particular VCM doesn’t have much range of motion. It definitely moved when I tried to adjust the focus in software, but it didn’t move enough. At the very least, it was a great way to confirm that I was taking the right approach. I just needed the correct elusive part. Where could I buy it?
Searching around more for VCMs, I found some interesting matches on made-in-china.com. I had never heard of that site before, and it felt more like it was for larger companies looking to source parts for big projects. I was a little worried that as just a random guy, nobody would want to talk to me. Despite my reluctance, I decided to check it out. Several of the VCMs for sale on that site looked identical to what I was looking for!
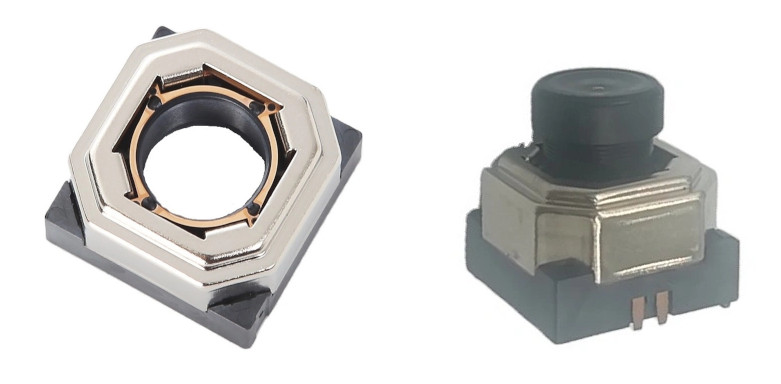
They were all sold by Chengdu Century Huasha Trading Co., Ltd. Their website had even more details. In particular, it looked like the VCM model 04-006-012 was exactly what I was after. I decided to sign up for an account and contact this company! What would I have to lose?
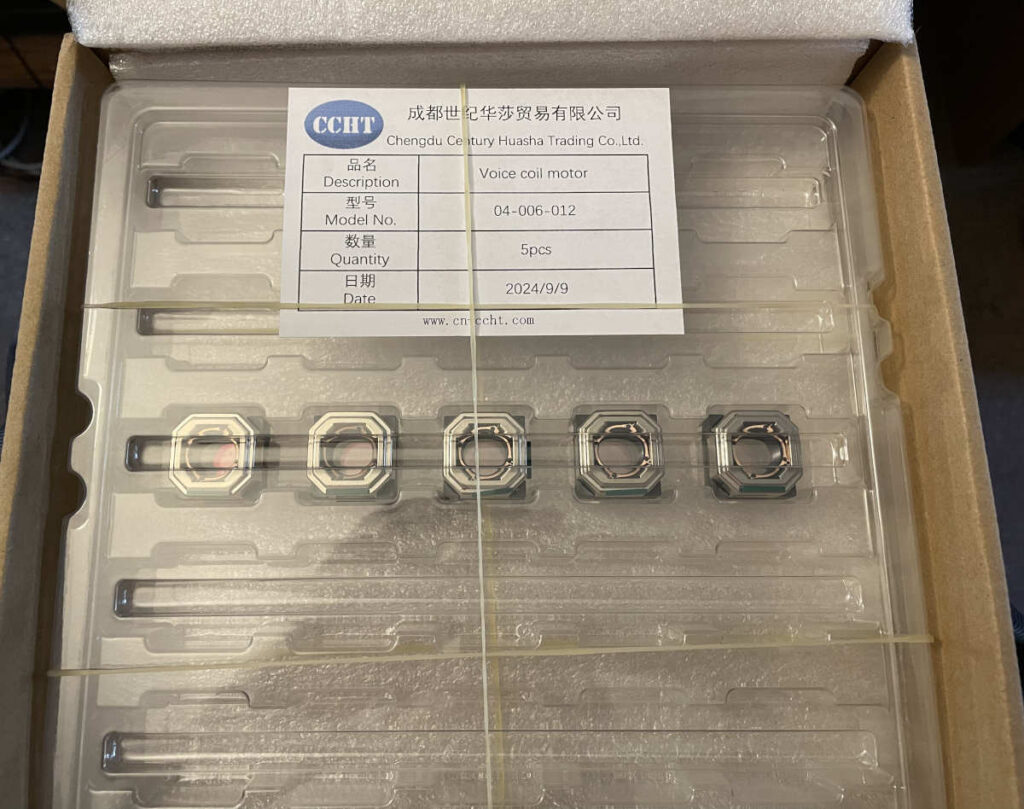
This turned out to be a very pleasant experience. I wrote back and forth with Peter, who provided me with a datasheet and STEP 3D model file. He said I could buy samples for $15 per piece, and they would include the pink IR cut filter that was also glued onto the original faulty one. That sounded totally reasonable! Unfortunately though, the shipping cost would be $65. To make it more worth my while considering the shipping fee, he also offered to sell me five VCMs at $12 per piece, for a total of $125 including shipping. The lead time would be 5 days due to no inventory.
I pushed back a little and asked if there was any other method that could be used for shipping, but that was all they could do. I had no choice. This was the only supplier I could find for this type of VCM, and unfortunately for small orders like this, it’s just not economical to buy things like this in small quantities.
What the heck though? I still wanted to fix this dang thing. I opened up my wallet, let the moths fly out, and paid $125 to order five of them shipped from China. It was my only opportunity to fix the webcam by finding a new replacement part, and it would make for a cool story to tell. Was this a smart idea? Probably not. Oh well, I did it anyway. I had to use PingPong, which I had never heard of, but everything worked okay and my payment was received.
I was worried about possibly needing to deal with customs stuff and having to talk with a broker or whatever, but my understanding is that the (relatively) small value of the package and the particular category of item I was importing to the United States meant that I didn’t need to pay any extra taxes or fees. That’s how it worked in September, but I have no idea if that’s going to change anytime soon.
Eight days after I paid, UPS delivered a package. Inside, I found a nice little box containing five brand-new VCMs! With the new VCMs in my hands, I could finally say that I had successfully convinced the factory to manufacture them for me, albeit expensively for this repair.
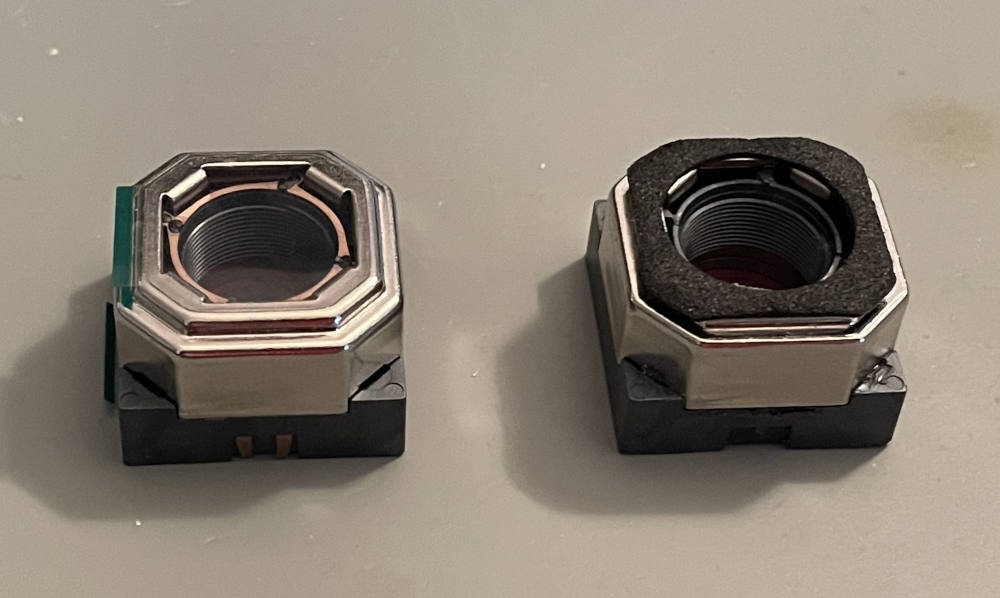
Here’s a comparison between one of the new ones and the original. It may look like there’s a difference inside, but I had pulled the springs out of the old one. The new VCM is exactly identical to the old one, aside from a piece of foam affixed to the old one and protective covers on the new one.
Before I could try out one of the new VCMs, I really needed to clean off the IMX327. It had been sitting around uncovered for weeks and likely had acquired some dust particles. I bought a camera sensor and lens cleaning kit on Amazon and cleaned the sensor. I didn’t really know what I was doing, and honestly I still don’t, but I really had nothing to lose. Except some money and my pride.
After cleaning the sensor, I removed the bottom protective sheet on the new VCM and then placed it over the sensor. It was a perfect snug fit. The old, hardened glue grabbed onto the new VCM and held it in the correct position even though it wasn’t really attached. Then, I soldered the two coil contacts down to the PCB.
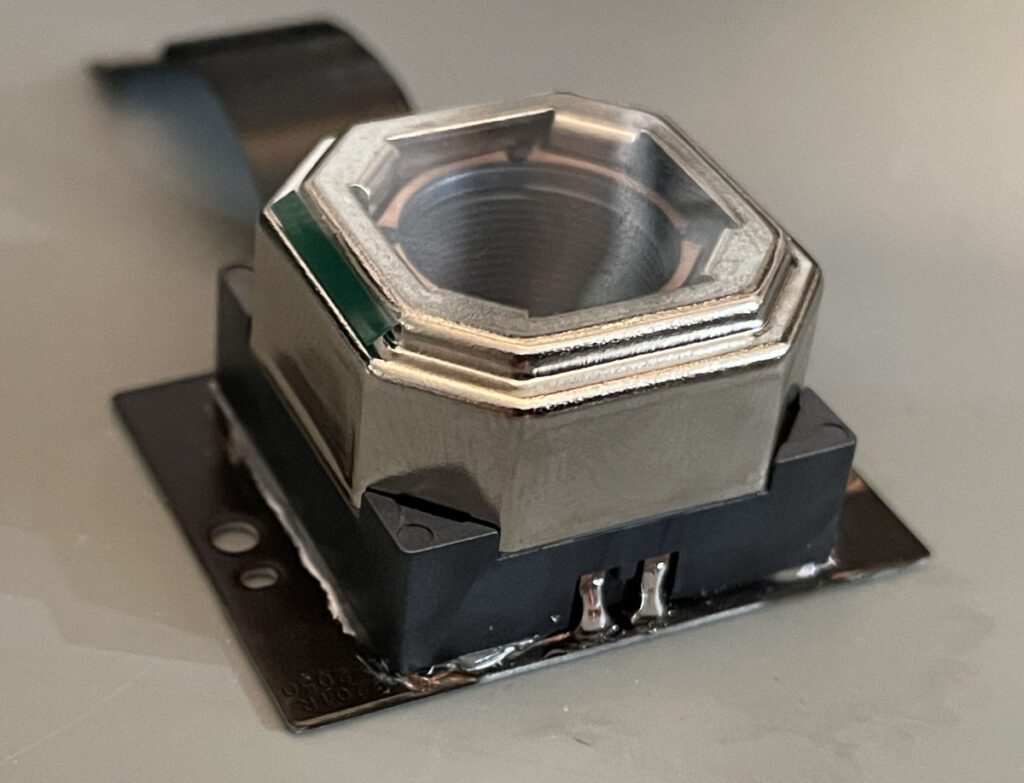
All I needed to do was remove the top clear sheet, screw the lens into place, and try it out!
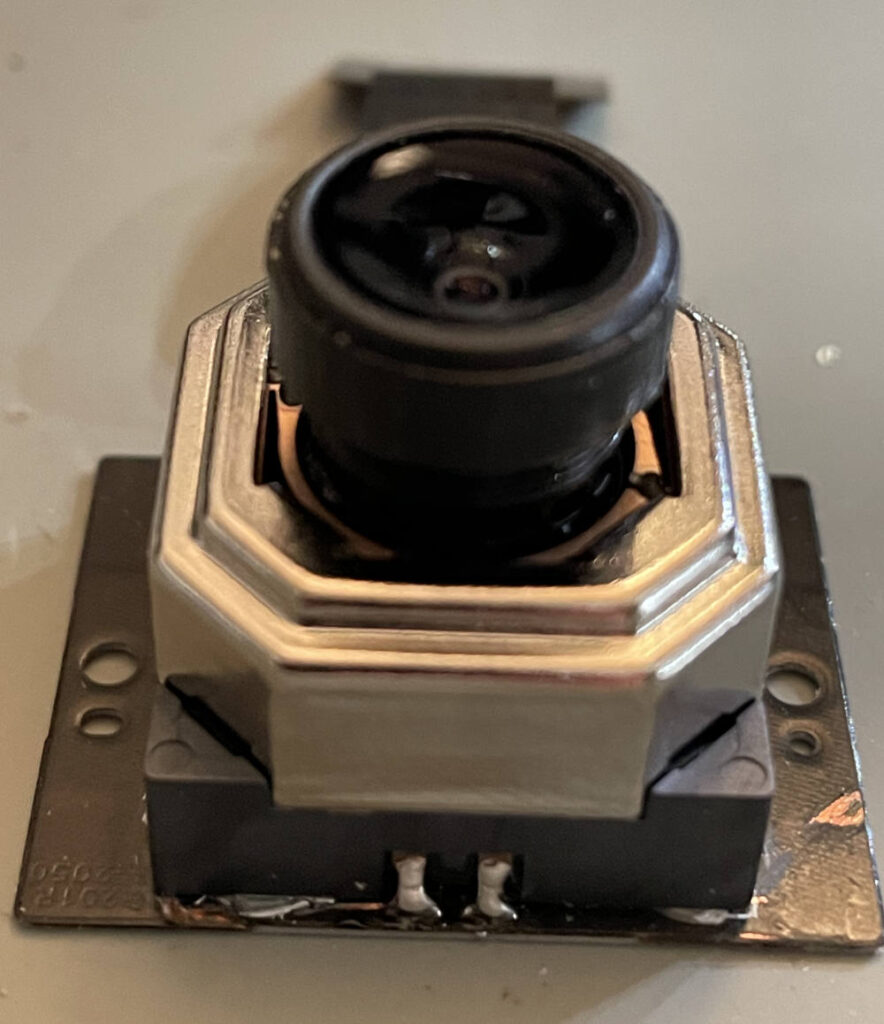
I didn’t glue the lens into the VCM. The fit was tight enough that I wasn’t worried about it moving. I totally understand why it was glued in place in the actual product, but I didn’t bother for my purposes.
Finally, the moment of truth. I plugged my repaired camera module into the main camera PCB, plugged it into my computer, and opened up the Razer software to see what would happen.
I don’t really have an easy way to show this visually, but all I can say is, it worked! The new VCM works great and the camera’s focus control has been successfully restored. It has a good range of focus just like the other working one that I didn’t have to disassemble. I don’t know if I have the lens positioned perfectly, but it seems fine.
To button it up, I added some super glue to ensure the new VCM would stay attached to the circuit board. I got impatient with how long it was taking to harden, so I ended up (probably stupidly) sprinkling some baking soda onto it to harden it immediately. This made a big mess and I instantly regretted it. Maybe there’s some kind of epoxy that would work better if I ever have to do this again.
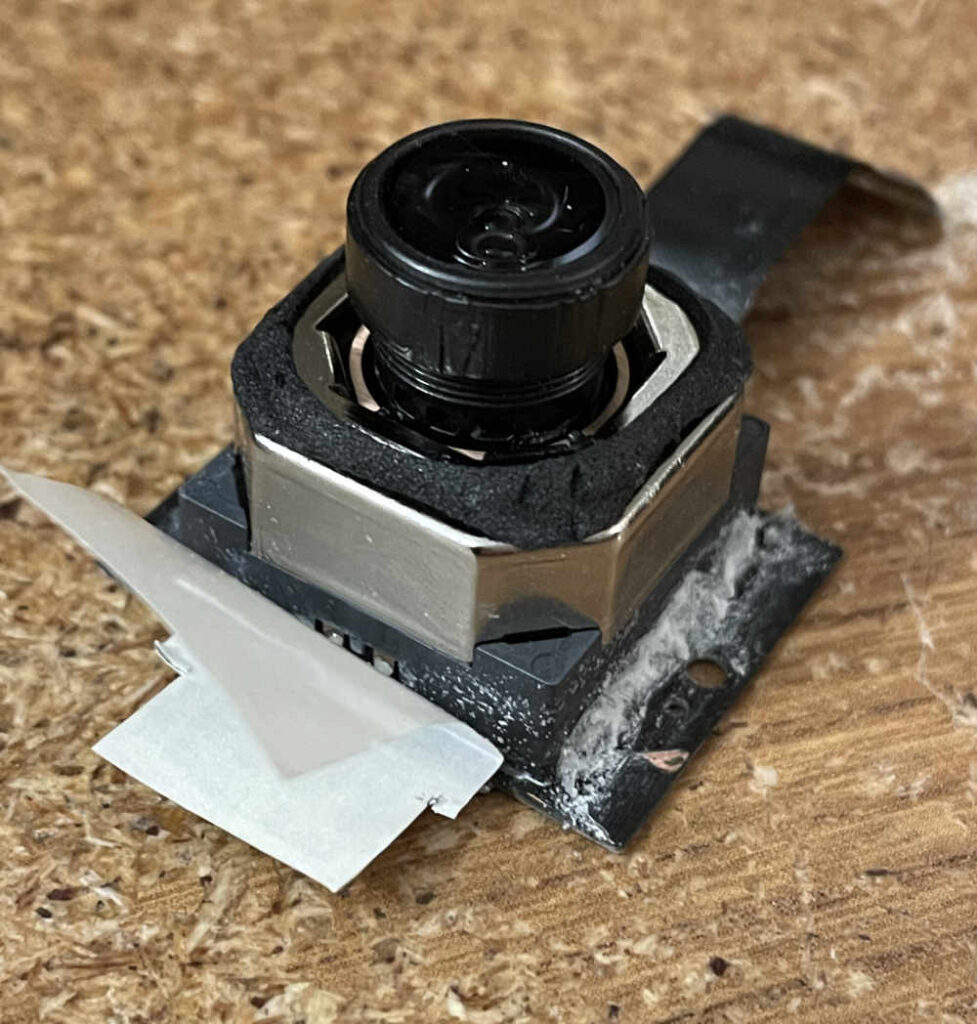
The original copper tape was also no longer sticky, and I had some aluminum tape on hand, so I just cut some of that into the same shape and used it instead. You may have also noticed that I moved the piece of black foam over to the new one.
Here it is, installed back into place in the webcam’s housing.
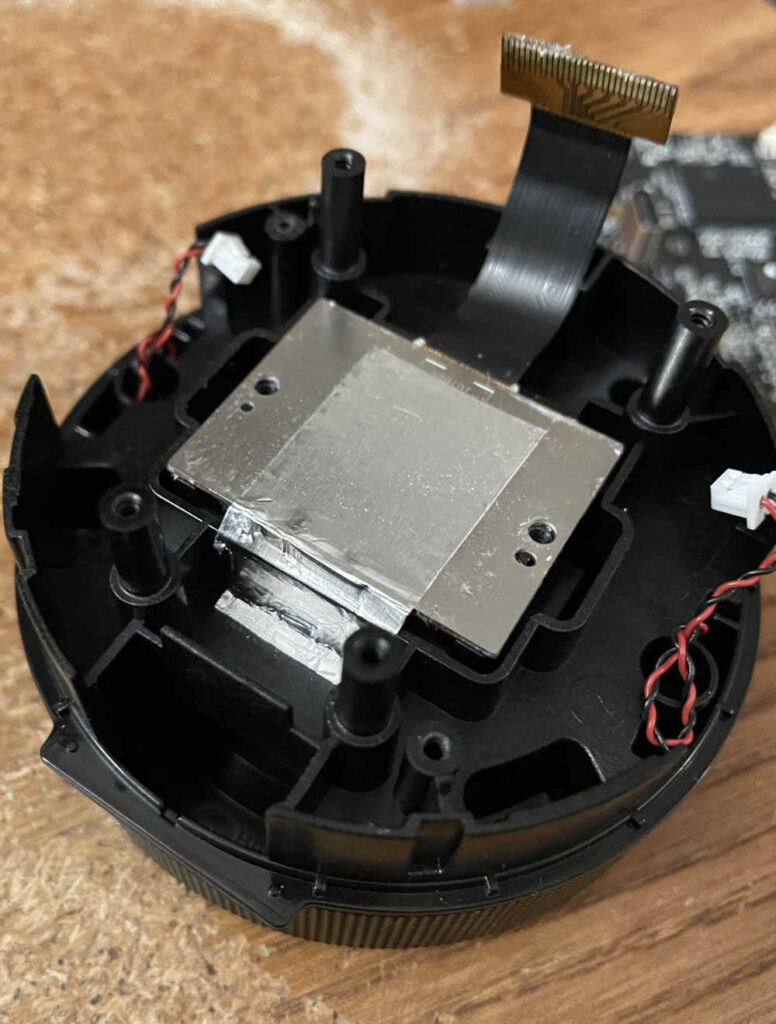
You can see in the picture above that there is some gunk on the flex cable where it is supposed to plug into the main PCB. Yeah, somehow I screwed up and got some super glue on there. I’m so smart. Wouldn’t that have been great? Get all the way through the repair and then ruin the whole thing by accidentally spilling glue all over the cable connections? Luckily, it didn’t damage anything and all is well.
After testing out the camera, I am confident in saying that you can’t even tell that I repaired anything! It works just fine, I don’t notice any specks in the picture, and it’s completely back to working order.
I have noticed that these cameras seem to have random USB issues, at least in my experience. They’re pretty picky about the USB cable you use with them. I’ve seen both cameras cause all USB traffic on my computer to freeze — the keyboard and mouse stop working until I unplug the camera, or if I don’t unplug it after a minute or two, the entire computer restarts. Since they both do it, it has nothing to do with my VCM repair. In particular, my Intel Core i7-6700K seems really susceptible to problems when it’s plugged in, especially if I have the camera set in a mode where it uses more USB bandwidth, like uncompressed video instead of MJPEG. I’ve seen other people online with similar complaints. I think it’s a flaw in the product to be honest. Switching to MJPEG seems to make it more stable, but then you’re not getting the full uncompressed video quality that it claims to support.
Maybe it’s just something about my computer. After all, it’s starting to get old. I’ve never seen any other USB device do that though!
Anyway, that’s the story of how I repaired a Razer Kiyo Pro that lost the ability to control focus. I learned a lot during this project! Now I understand how focus is controlled through software. You send commands to a chip that drives a small controlled current through a coil, which moves the lens. If you ever hear a click when you unplug or power off this type of webcam, you are hearing the spring pull the coil back down to its minimum position as the current through it drops to zero and it loses its attraction to the magnet.
On a random note, I have more recently discovered that searching Google or Baidu for XL-TVB12003C does reveal another site (V-LIGHT Corporation) that describes this same VCM. At the time when I was first searching for a replacement part, this result was definitely not appearing on Google. I don’t know whether this company or CCHT is the actual manufacturer, but I will say that CCHT was a pleasure to work with.
With that said, finding and buying the new part was difficult. I probably shouldn’t have done it. It was neither economical nor practical, but I was stubborn enough to fix it anyway. By the way, I still have four more of these brand-new VCMs. Anybody else have a Razer Kiyo Pro with the same focus problem and need a new VCM? I wouldn’t mind recouping some of my costs. I will warn you, though, that separating the VCM from the image sensor PCB was extremely difficult and risky. I just lucked out and didn’t damage anything when I did it.


Wow Doug- this is another fine repair, and extensively detailed worklog.
I’m really enjoying the blogposts.
Thanks for sharing this with us!
Thanks Steve, I appreciate your kind comment!
That’s very interesting – I always assumed that the motor controlling the focus was, well, a motor. Amazing how the manufacturer can squeeze down the number of parts required.
Yeah it’s pretty nifty! I had no idea what was going on in there. Makes a lot of sense. For the tiny amount of motion required, it’s definitely an elegant solution. It’s still a motor, just a different kind of motor 🙂
Great Article! I really enjoyed your article, because I never had the idea how they do control the focus.
I have the same camera and I’ve been using for more than a year – but I had to put it to retirement due to how unreliable the experience was with it. It was constantly causing me USB (M1 PRO Mac) issues and was freezing the computer or refusing to work at all. I had to constantly manually re-connect the damn thing to get detected.
Hey, this is a really detailed and professional article.
I’m pretty sure you’re the only user who has looked at Kiyo Pro in this much detail.
I’m also currently trying to modify my Kiyo Pro to use it as an infrared camera.
Is it difficult to remove the IR-CUT filter?
Hi Taeil,
Thanks! Yeah, I can’t blame people for not wanting to dig deep into the camera module especially. I would say that yes, it would be a difficult task to remove the IR-CUT filter. I’m not familiar with modifications like that, but here are my thoughts:
It’s easy to get the camera module out of the housing, but in order to get to the IR-CUT filter, you will need to separate the VCM+lens assembly from the main sensor PCB. This was extremely difficult because it seems to be glued down to the PCB with something very strong. You would also want to make sure you desolder the two pins going to the main sensor PCB, so that they are detached from the PCB, before prying the VCM off. Otherwise you will yank those two pins out and focus control will never work again. It requires a LOT of force to separate them. I was very lucky to not damage any of the components on the PCB such as the sensor. I think I used an X-acto knife to slowly make a little separation so I could fit something in there to pry with.
Once the VCM is off, I’m assuming it wouldn’t be too bad to take the filter off. It’s glued to the bottom of the VCM, looks like there’s a little dab of glue in all four corners. I’m guessing if you got a little knife in there you could separate it. Then you could reattach everything like I did in my repair (after cleaning off the image sensor of course), and theoretically the filter would be gone at that point.
If I’m being honest, I probably wouldn’t recommend trying it unless you don’t mind destroying your device.
Thank you for your detailed response.
I followed your post and attempted the disassembly. However, I couldn’t bring myself to desolder the two pins connected to the PCB for separation. Instead, I tried to disassemble the lens and carefully break the IR-CUT filter with a needle-like tool.
Unfortunately, the lens is also secured with very strong adhesive. I tried to use a knife to scrape and pry it apart, but the gaps were too tight, and I was concerned about causing damage to the device, so I decided to stop.
If this device were my personal property, I would have gladly taken the risk. However, since it’s part of a company project and a loaned device, I felt it would be reckless to proceed further.
For now, I’ve decided to source a camera without an IR-CUT filter and use that instead.
Still, your post was truly inspiring and very helpful. Thank you so much!
Yeah, the lens is definitely glued into the VCM. I think it would be a tough task to break the seal of the glue without damaging the VCM. It would be hard to remove the filter from the top anyway. Seems like you made a good decision if it’s not your device!
Hi, my name is Alberto.
I was reviewing your post; excellent explanation.
I have a Razer Kyo Pro camera, and the C connector is broken. No one here in Lima, Peru, knows how to fix it. They tell me there’s nowhere to solder it and that everything is integrated into the motherboard.
The photos are on this drive. Could you help me with this issue? How do I connect a new C port to the motherboard?
https://drive.google.com/drive/folders/1Utd6YwljnZBtZuhvC4JuHrz-iQL96f9c?usp=sharing
Hi Alberto,
Thanks! You would need to find a new USB-C connector that matches the PCB’s footprint. It looks incredibly difficult to solder and probably requires hot air to remove and reinstall. I’m not sure if a soldering iron could get in there to solder the pins.
It may be a struggle to find a matching connector. One big concern would be whether there is any damage to the traces on the circuit board. Any trace damage could be difficult to repair. What I would do is search Digi-Key or similar suppliers (I’m not sure what is popular in Peru) for USB-C connectors categorized as both “through hole” and “surface mount” and see if you can find one that matches. If you could find a match, it seems like it would be a job for a hot air rework station to remove the old one and solder in the new one.
Also, thank you Domantas for your earlier comment! I somehow forgot to reply. It does sound like these cameras are somewhat unreliable and your experience lines up with mine.
Hello, I’m Alonso Vargas. I have the same problem with my Razer Kiyo Pro and wanted to share my experience. After running some tests, I concluded that the issue lies with the cables and the friction created in the USB-C port of the camera. If you don’t use the original C cable that came with the camera, false contacts are likely to occur, which can damage the camera’s male port over time.
A few weeks ago, when I connected my camera, everything worked perfectly. However, when I tried using it again after a week, I noticed that when I connected it to my PC, the other peripherals turned off. This suggests that the USB-C port of the camera was slowly deteriorating. It seems that the camera’s port is shorting out with the PC, preventing the computer from detecting it correctly.
Just this month, my camera broke, so I found it quite funny to come across this post on the forum right now, especially since I’m also from Lima, Peru, just like Alberto. I really appreciate Doug Brown’s suggestion about using the heat gun to replace the connector—I’ll definitely keep that in mind if I decide to attempt the repair!
I’ll keep sharing updates on my experience with the camera. If anyone else has had a similar issue or has any suggestions, it would be great to receive your advice!
Thanks, and let’s stay in touch!
https://drive.google.com/drive/folders/1eOzAVUXj9_KZyRPYcqzBFn3bQunlrkeM?usp=sharing