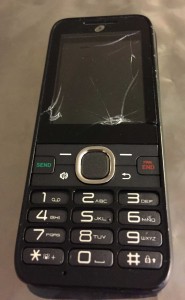
Recently, my dad’s TracFone Huawei H110C cell phone (with over 900 minutes and 200 service days) was a victim of mistaken identity. It was loaned out to someone else, and their dog thought it was a chew toy.
I was called to the rescue. The phone still worked, but the display was all screwed up so I couldn’t see anything. My first thought was to transfer the service (phone number, minutes, service days) to a new phone, but I discovered that you need to enter and read back codes on the old phone in order to transfer your service, which you obviously can’t do with a broken display. I also read on forums that it can be time-consuming to work with TracFone to recover your minutes from a broken/lost/stolen phone, so I didn’t really want to mess around with that.
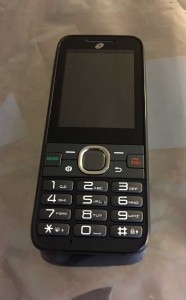
I tore apart the old phone to try to see if it was possible to replace the display. I was able to remove the LCD display module, but I couldn’t find that particular display available for purchase anywhere online. It may have been custom-made for Huawei. A brand new H110C costs less than $10 at Wal-Mart, so I decided the easiest approach would be to buy a new H110C and remove its display, then plug the new display into the old, broken phone and hope that it would work long enough to get the minutes transferred off of it.
It worked! I was able to enter the codes needed to transfer the service to another new H110C, which I also bought at Wal-Mart. Rather than reassemble the first new phone and transfer the service to it, I decided it would make more sense to buy a second new phone because some components in the phone are glued together, and you have to sort of mangle a metal shield in the phone in order to get to the display. So this process required me to buy two new H110Cs at Wal-Mart for a total price of $19.76. Not bad! Other than setting off the alarm at Wal-Mart when I left because the employee who helped me forgot to do something to the phone boxes, buying the phones was a painless process.
I hope I can help someone else out who runs into this problem, so here’s a tutorial on removing/replacing the display in a Huawei H110C.
Get the phone out of the box
Remove the phone from the box. Leave the battery out (or if it’s already installed, remove it).
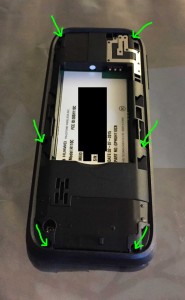
Remove the six screws from the back
There are six screws on the back of the phone. Remove them. They are Torx T5 screws, so you will need an appropriate screwdriver. One of them (right center in the picture) is covered with a white sticker as proof that you haven’t opened it. We’re going to void our warranty here anyway, so no big deal.
Separate the two halves
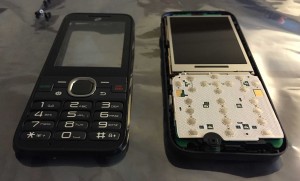
Removing the screws will not automatically separate the plastic pieces that hold the phone together. Carefully slide an old credit card or similar tool in between the two halves to release the latches that hold it all together. Work your way around the entire phone until the two halves are separated, and then lift the top of the case away.
Remove the button board
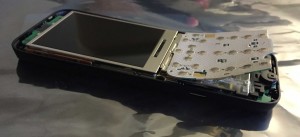
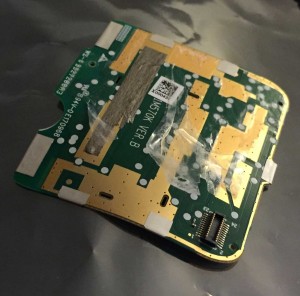
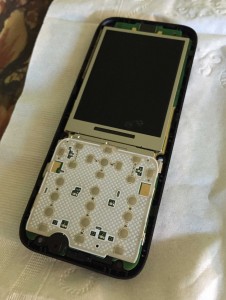
The buttons are on a small flexible white circuit board. It is glued (and/or taped?) to the metal shield underneath it. Carefully peel it up off the shield. There is a connector on the bottom of it that connects to the main phone circuit board below. The connector should easily disconnect as you peel the button board away. It’s difficult to not bend the board, but try to keep it as straight as possible because we will need to use it again when we turn on the old phone.
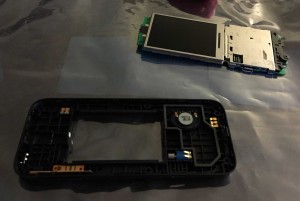
Pull the bottom half of the phone out of the plastic case
At this point you should remove the main phone board and display from the bottom case. If you push it around enough it should come out. I struggled with it a little bit, but eventually I was able to snap the circuit board out.
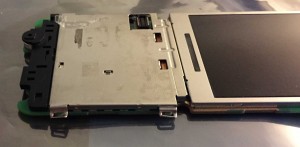
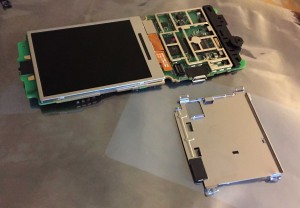
Remove the metal shield
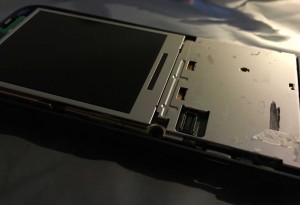
In order to get to the connector that connects the display to the board, you will need to remove the metal shield. This shield is probably an EMI/RF shield blocking interference to/from the phone. There are four tabs that hold it in place–two on each side. Peel them back, and then pop the metal shield off. This may take some force, so be careful. I used a small set of needle-nose pliers. On the first phone I opened (the broken one), I mangled the shield pretty badly. I did a better job on the second one, but I wouldn’t count on necessarily putting it back together when you’re done unless you’re really desperate to only buy one new phone instead of two.
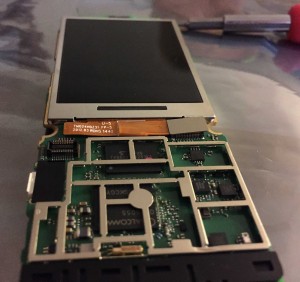
Disconnect the display from the main board
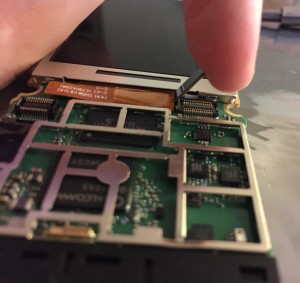
The display is connected to the main board through a small gray connector attached to a ribbon cable. It is easy to remove. Gently pry it up (I used a small screwdriver).
Remove the display
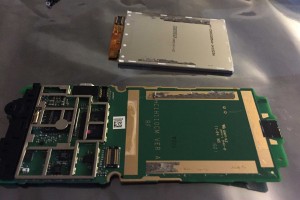
Removing the display is pretty difficult because it is also glued/taped down. I couldn’t figure out exactly what they used, but it seemed to be some sort of really sticky tape. I carefully stuck a thin screwdriver between the phone board and the display, and very carefully pried it up a little bit at a time to break the bonding. Eventually it lifted off the board. Be very careful here, especially with the brand new phone, because you don’t want to damage the new display.
Repeat this process on your broken phone
Do the same thing to remove the broken display from the old phone. As you can see, the old one was damaged by a dog bite.
Put the new display into the old phone
Basically, just do these steps in reverse. Plug the new display and one of the button boards into the old phone’s main board. I left the metal shield off because I knew I would only have the old phone turned on for a few minutes. I also covered the bottom of the button board with Kapton tape to ensure it would stay insulated from any metal underneath, although I don’t know how important that was.
Write down everything about the old phone
You will need the MEID of the old phone during the transfer process. TracFone will probably already have your old phone’s MEID on file, but just in case, write it down or take a picture of it (it’s inside the battery compartment, on the back of the main circuit board).
Turn on the old phone
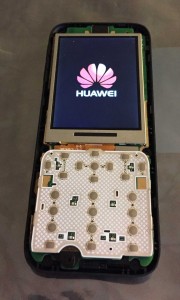
Put the old phone (with new display and button board) into a case, insert a battery, and turn it on. You can press the little buttons on the button board that correspond with the phone’s keys. Cross your fingers! Here’s what I saw after a second:
Begin the transfer process
Now, go to TracFone’s website and start the process of transferring the old phone’s service to the second new (unopened) phone. The TracFone site will walk you through entering some codes on the old phone and typing the result codes into their webpage to determine the number of remaining minutes and service days.
While you have the old phone turned on, be sure to write down the old contacts and settings so you can put them into the new phone.
All done!
After that, I was instructed to dial a number on the new phone to activate it. Activation worked painlessly and the new phone worked great. At that point I was able to turn off the old phone and get rid of it. Remember, lithium-ion batteries are dangerous if they get damaged, so don’t put them in the garbage–take them somewhere that can dispose of them properly. In all honesty, the dog was probably lucky that he didn’t puncture the battery.
The tape/glue/whatever was pretty annoying, and the metal shield was a pain to remove, but other than that, this phone wasn’t very difficult to take apart. It was definitely worth the less-than-$20 price to buy a brand new phone and another new LCD donor phone in order to recover all those minutes and service days from the old phone. I hope this little tutorial helps someone out there!


no comments